5D Configuration – Accounts
The following guide will show you how to navigate and use the 5D Configuration section.
To access the “Accounts” page click on the “Configuration” tab on the left of the screen and then click on “Accounts”
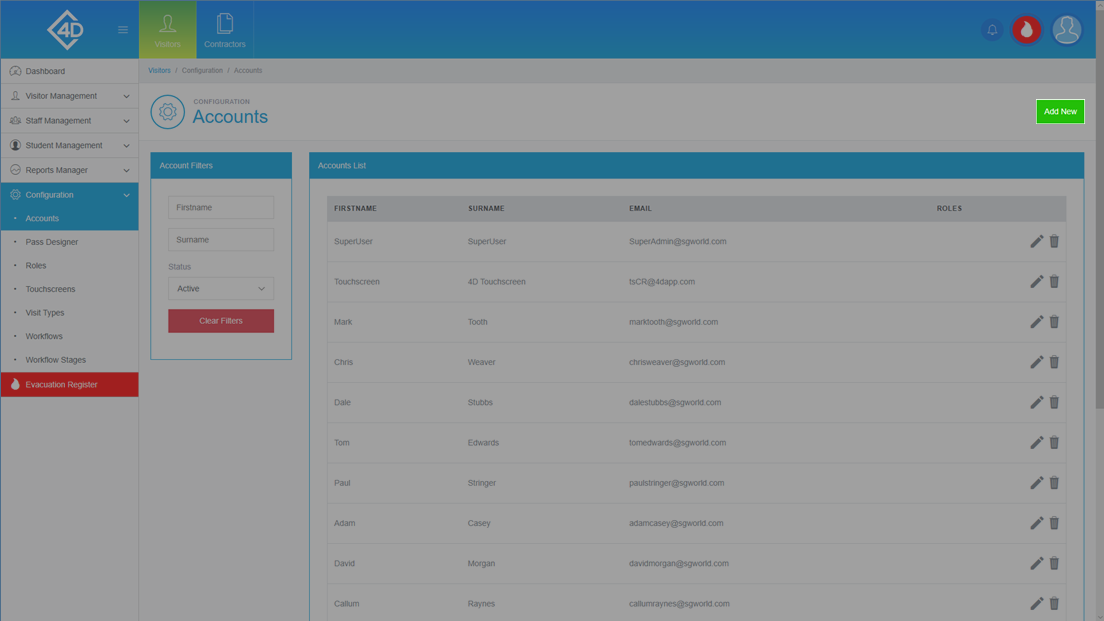
The “Accounts” page will then open and will look like the image below.
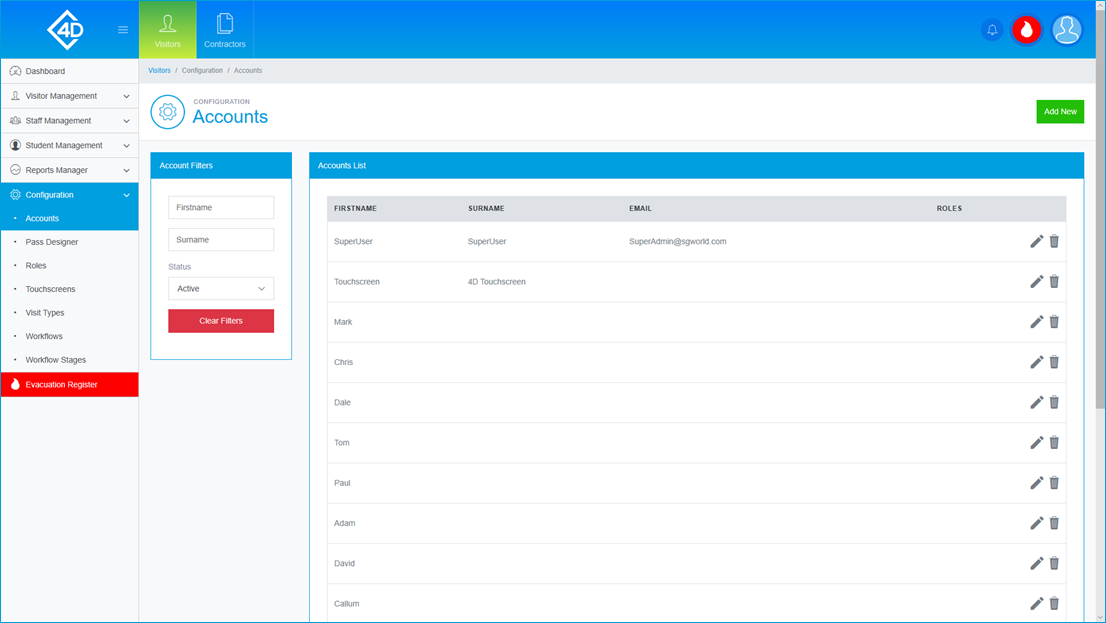
The “Accounts List” table shows a list of the accounts that are currently active on your system.
Listed are the “Firstname” and “Surname” of each account, along with an associated “Email”.
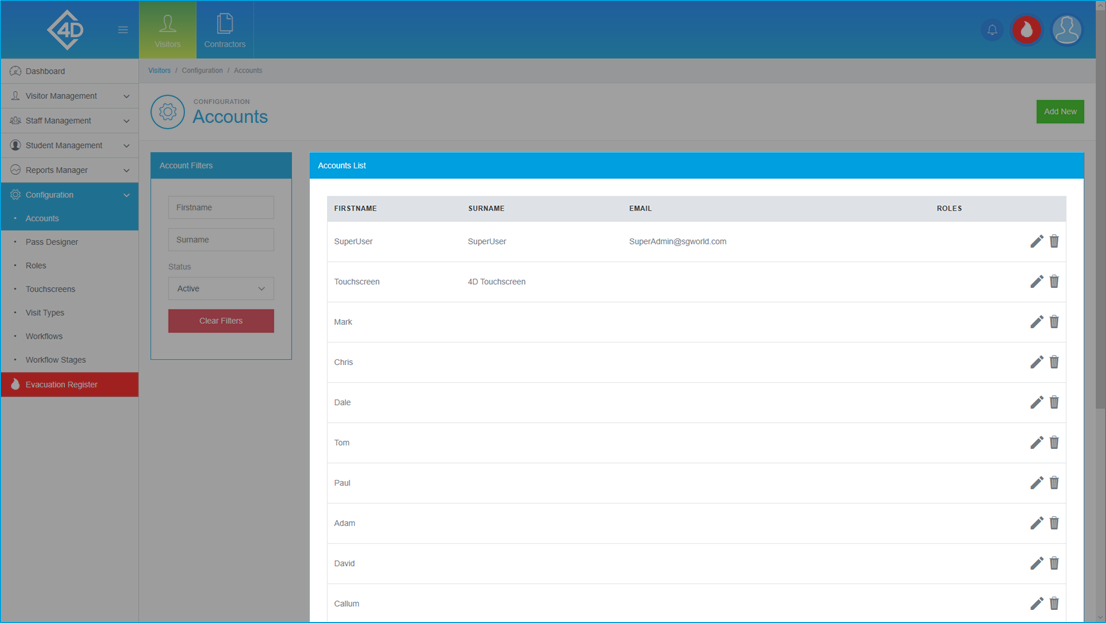
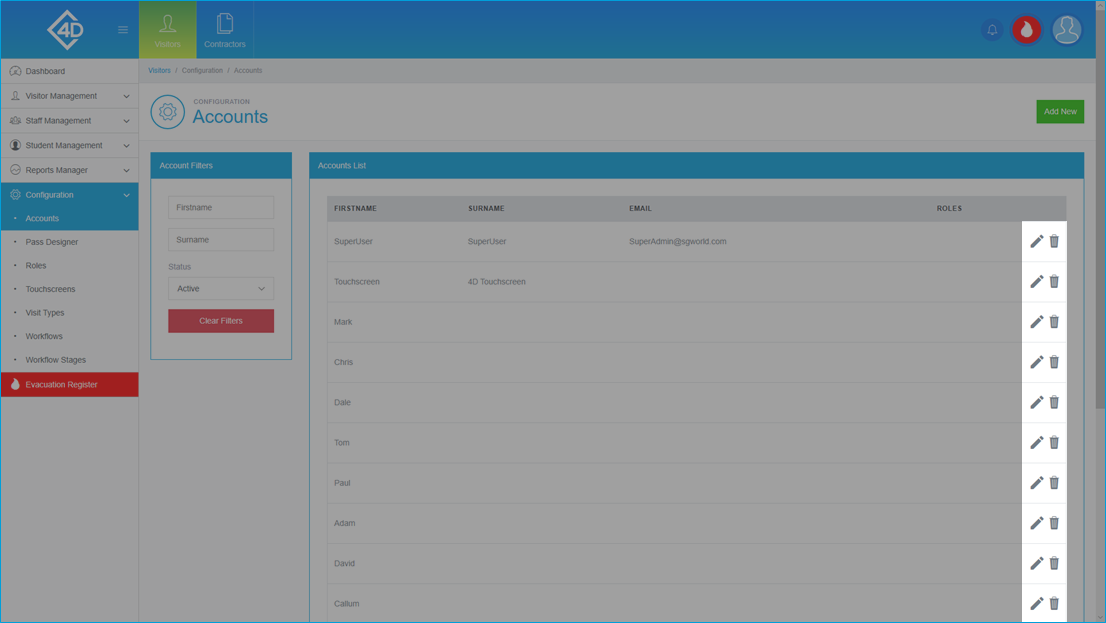
To edit the account you can click on the grey pencil on the right of the page.
You can also delete the account by clicking on the grey bin, you will be prompted to confirm your choice if this is clicked.
Please note that deleted accounts cannot be reinstated so any change will be permanent.
On the left of the page, you can search for accounts by their “Firstname” and “Surname”.
You can also filter by the “Status” of the account.
The “Clear Filters” button will wipe both fields and display the default view.
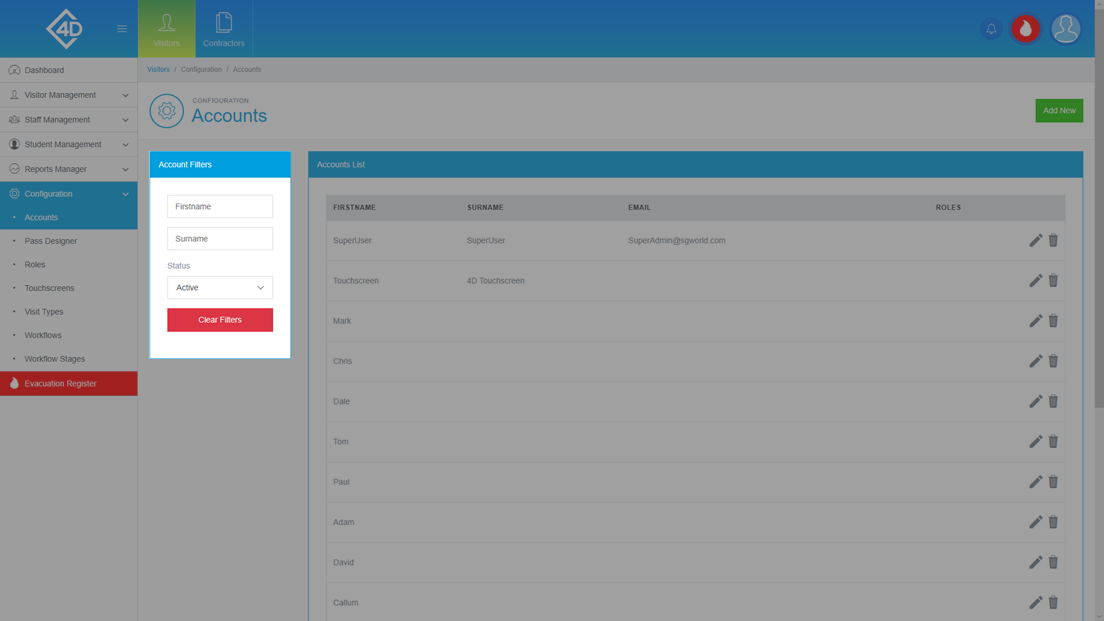
To add a new account click the green “Add New” button in the top-right of the screen.
Editing an Account
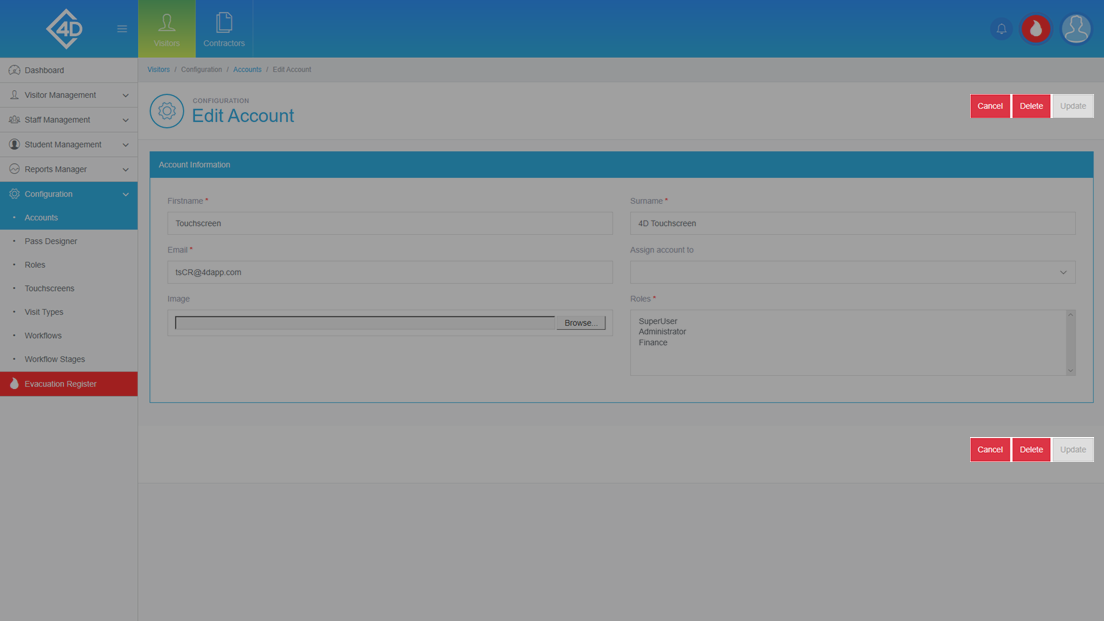
To start, click on the grey pencil button on any account which you wish to edit, you will then be taken to the following screen.
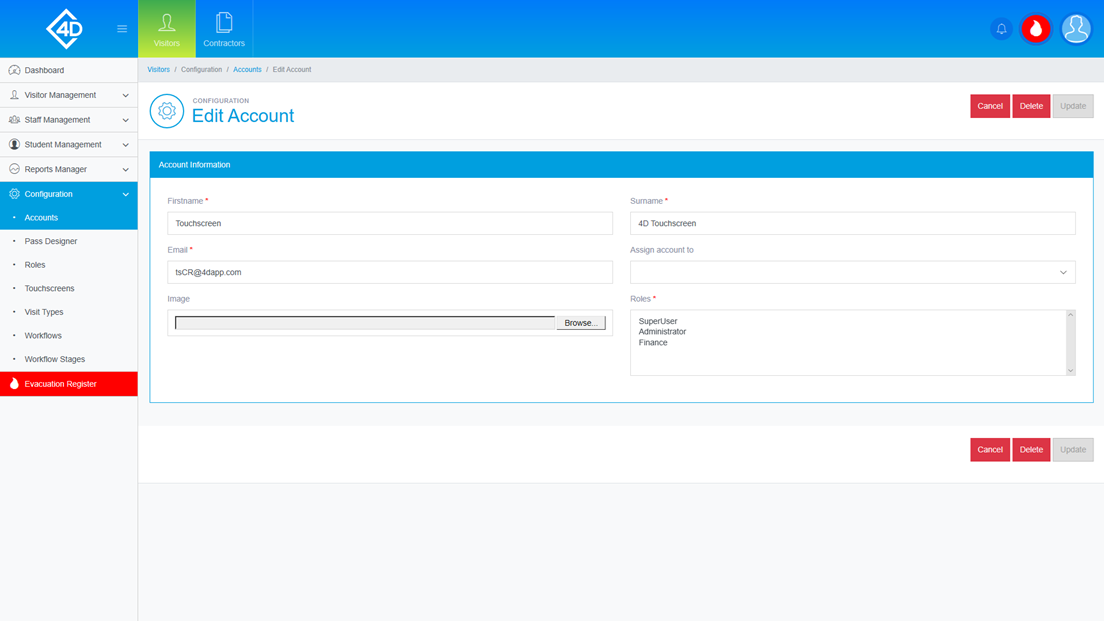
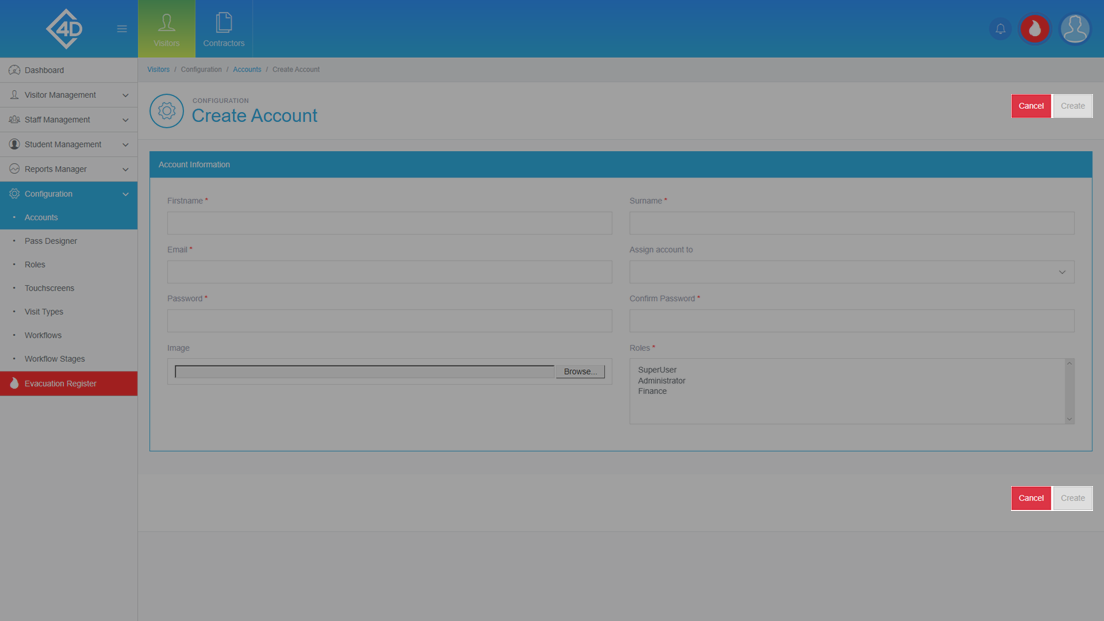
The “Account Information” table displays any relevant information that has been provided for that account.
Any field that is marked by a red asterisk must be filled in.
The “Assign Account” drop-down is used to tie the account to a staff member, this is mostly used for reporting and permission purposes.
You can attach an image to an account by using the “Image” box, this is useful if the account is tied to a staff member.
To change the role of the account, use the “Roles” box, this list will be prepopulated by standard roles, a role is used to provide permissions to an account.
If you wish to cancel any changes, click on the red “Cancel” button at the right side of the screen.
If you wish to delete the account, click on the red “Delete” button at the right side of the screen, you will be prompted to confirm your action.
If you have made any changed to the account the grey “Update” button at the right side of the screen will turn green, by clicking the button you will update the account information.
Adding a new Account
To add a new account click on the green “Add New” button in the top-right of the screen.
You will then be taken to the following screen, the functions of this screen are the same as the “Change Account” screen, and should be filled out the same way.
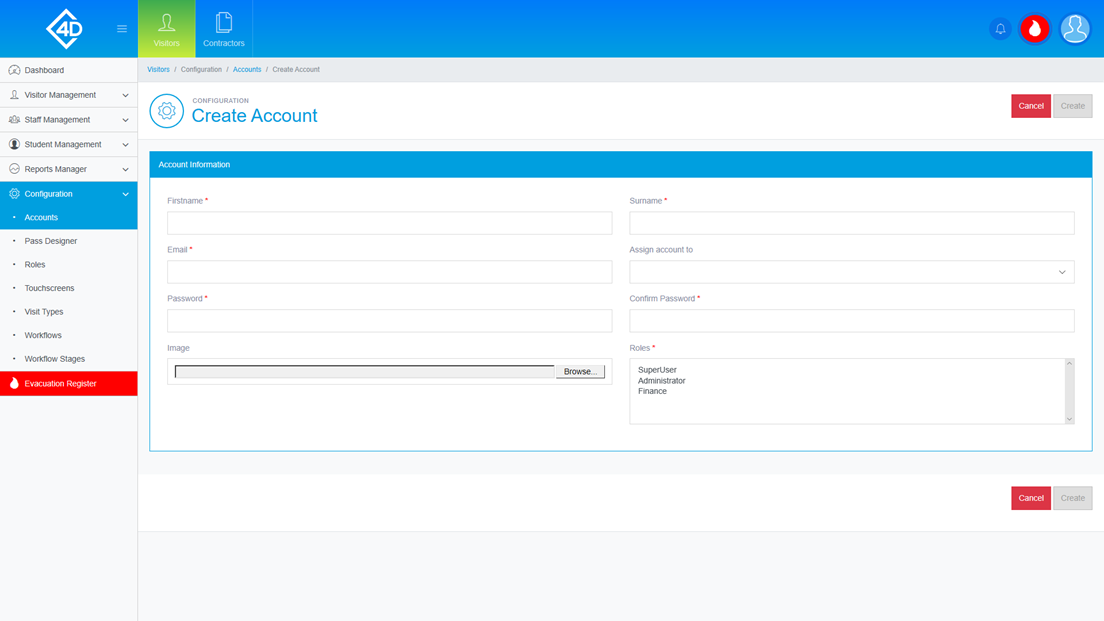
To cancel the creation of the account, click the red “Cancel” button at the right side of the screen.
To proceed with creating the account, click the green “Create” button at the right side of the screen.