5D Reports Manager - Custom Reports - Visits
The following guide will show you how to navigate and use the 5D Reports Manager Section.
To access the “Custom Reports - Visits” page click on the “Reports Manager” tab on the left of the screen and then click on “Custom Reports - Visits”
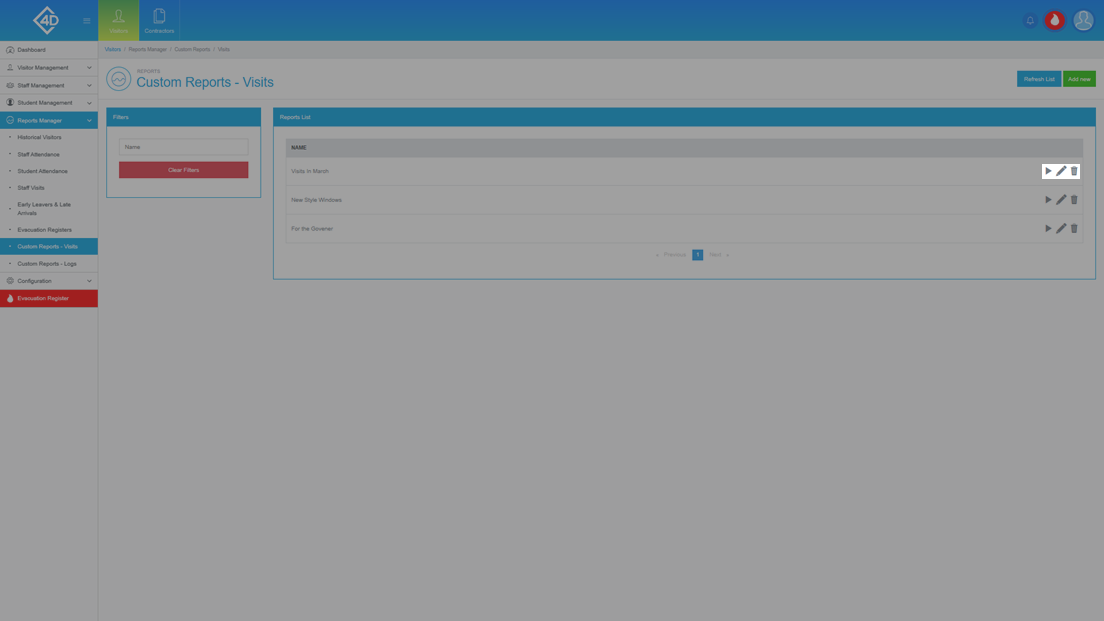
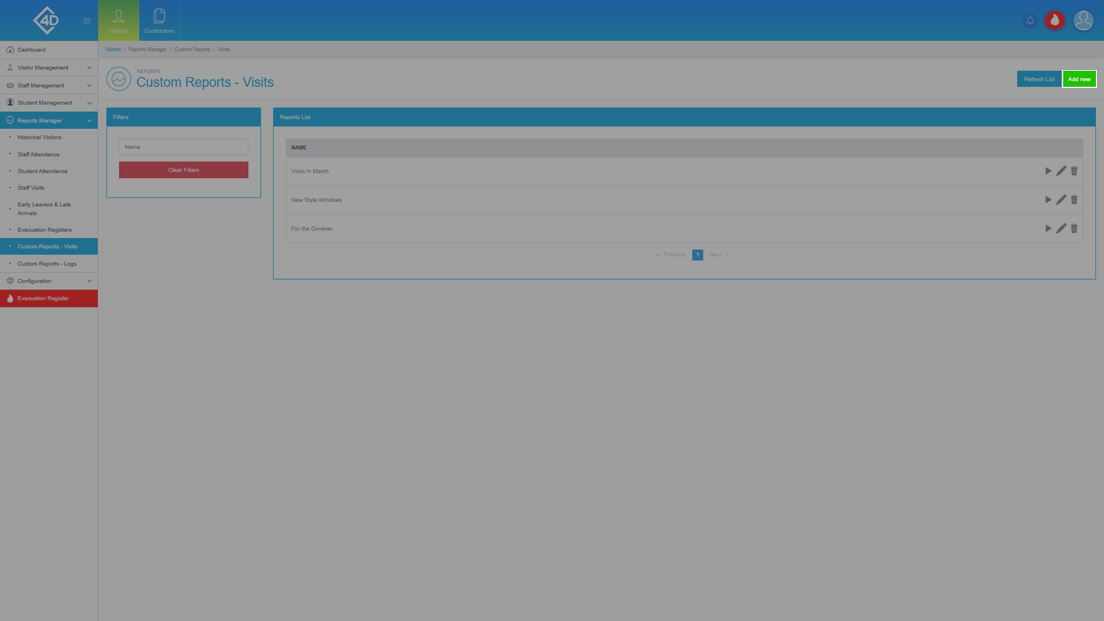
The “Custom Reports - Visits” page will then open and will look like the image below.
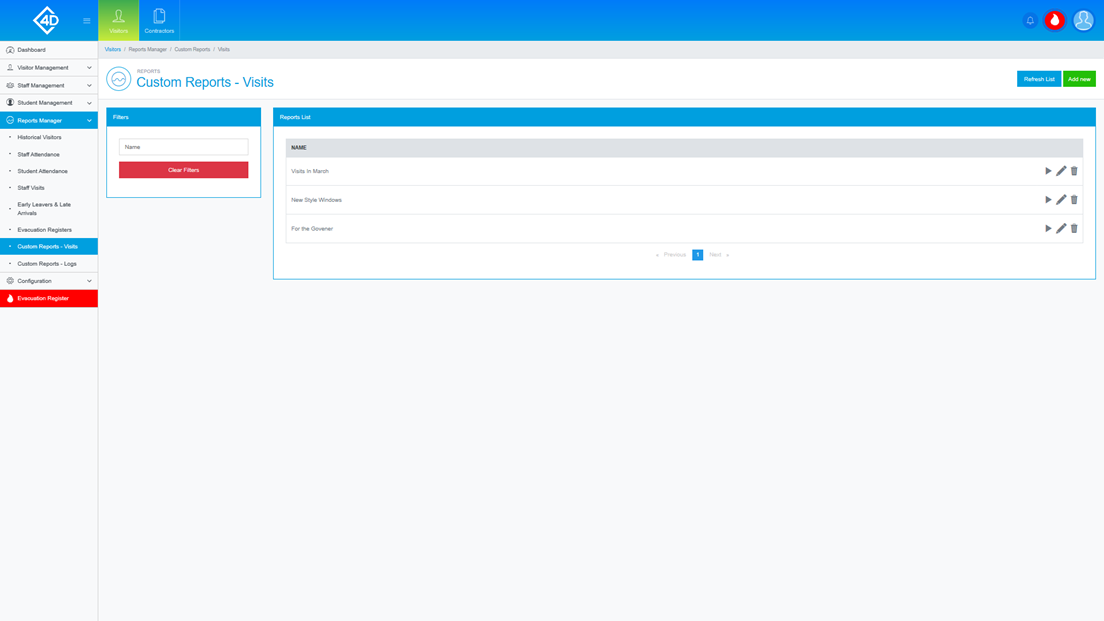
The “Reports List” section displays a list of all the Custom Reports in your system.
Listed is the "Name" of the Report.
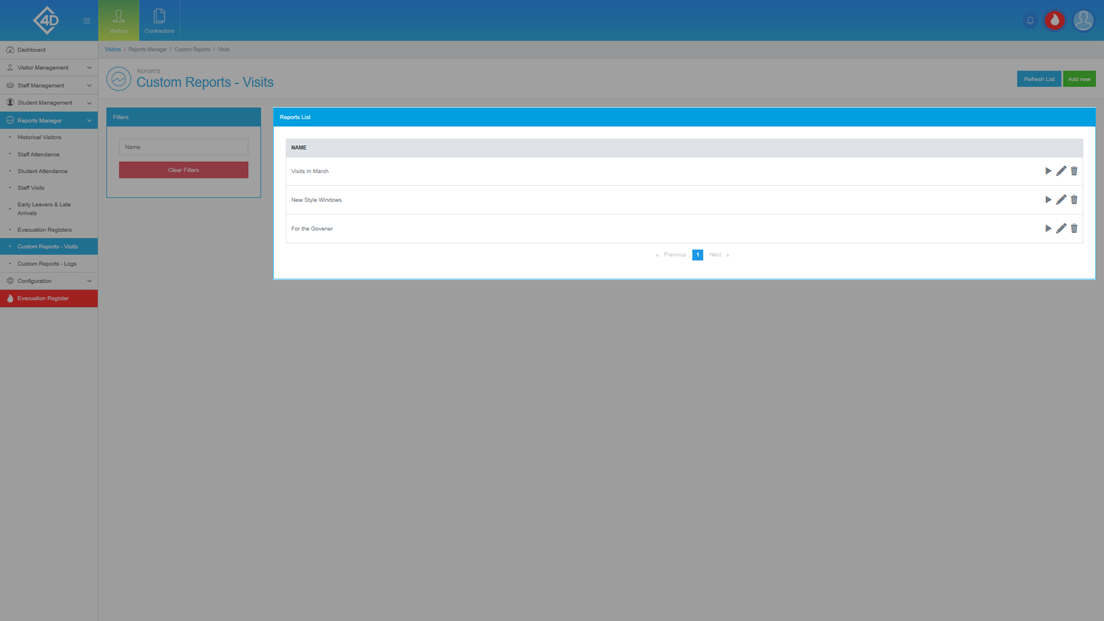
On the left of the page is the “Filters” list, this is where you can search for a Custom Report by "Name".
The “Clear Filters” button will wipe both fields and display the default view.
To the right of each Report is the "Run", "Edit" and "Delete" button, these are explained in more detail below.
Running a Report
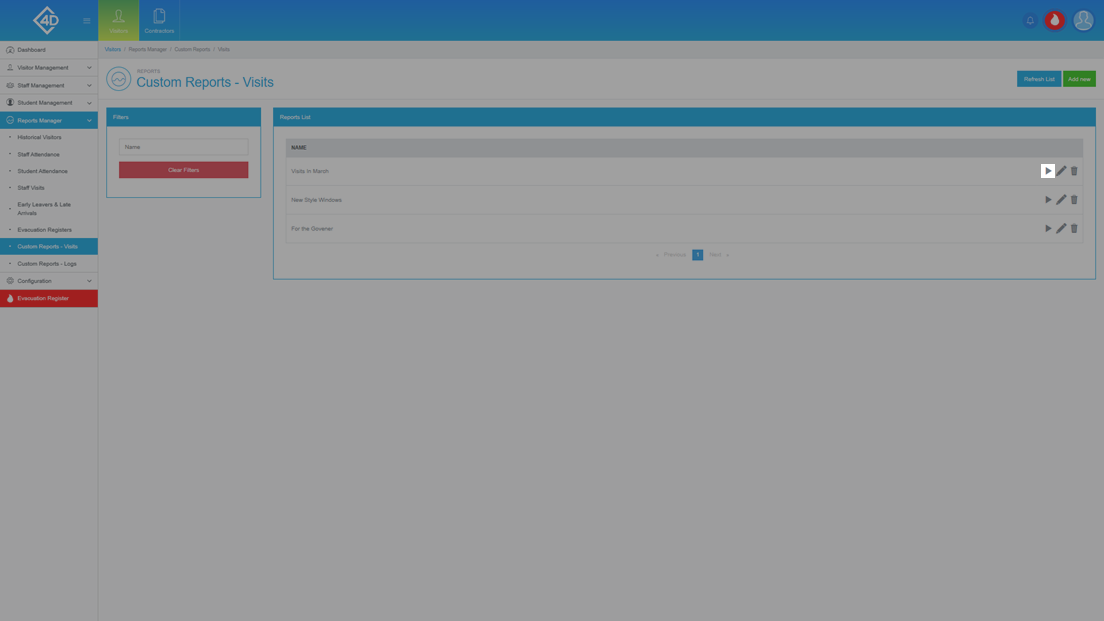
If you would like to run a Report, click the grey "Run" button to the right of a Custom Report.
Once you have clicked the "Run" button you will be taken to the following page.
Listed is the information that is relevant to your custom report.
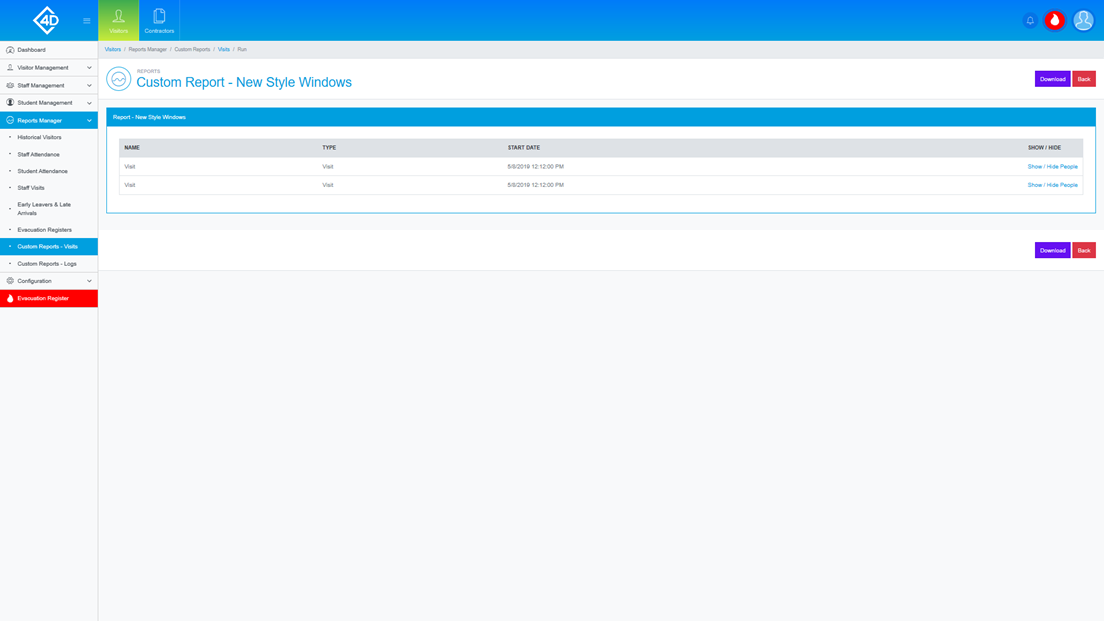
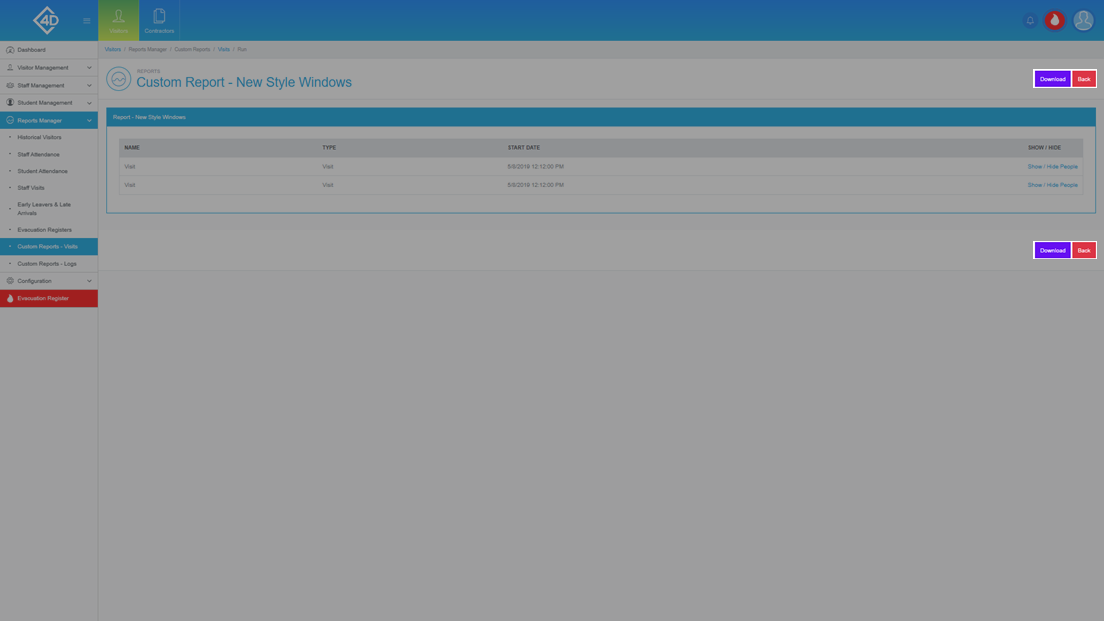
If you would like to download a copy of the custom report, click the "Download" button on the right of the screen.
If you would like to return to the previous page, click the "Back" button.
Editing a Custom Report
If you would like to edit a Report, click the grey "Edit" button to the right of a Custom Report.

Once you have clicked the "Edit" button you will be taken to the following page.
For more information on this page, please refer to the "Add New" section below.
Deleting a Custom Report
If you would like to delete a Report, click the grey "Delete" button to the right of a Custom Report.
You will then be prompted to confirm your action.

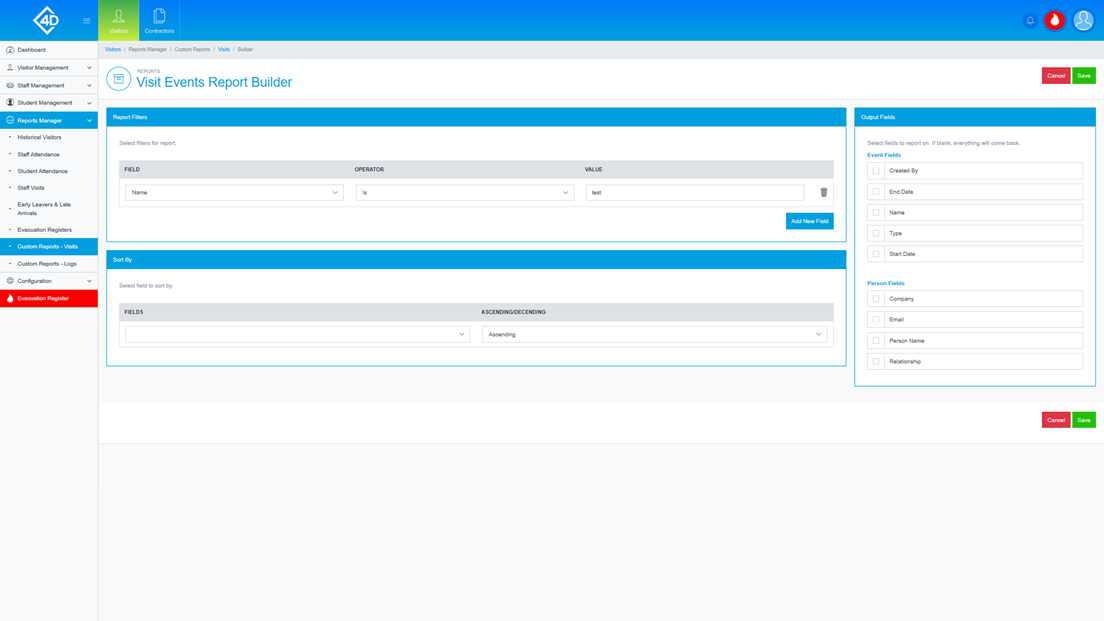
Creating a Custom Report
If you would like to create a new Report, click the green "Add New" button in the top-right of the screen.
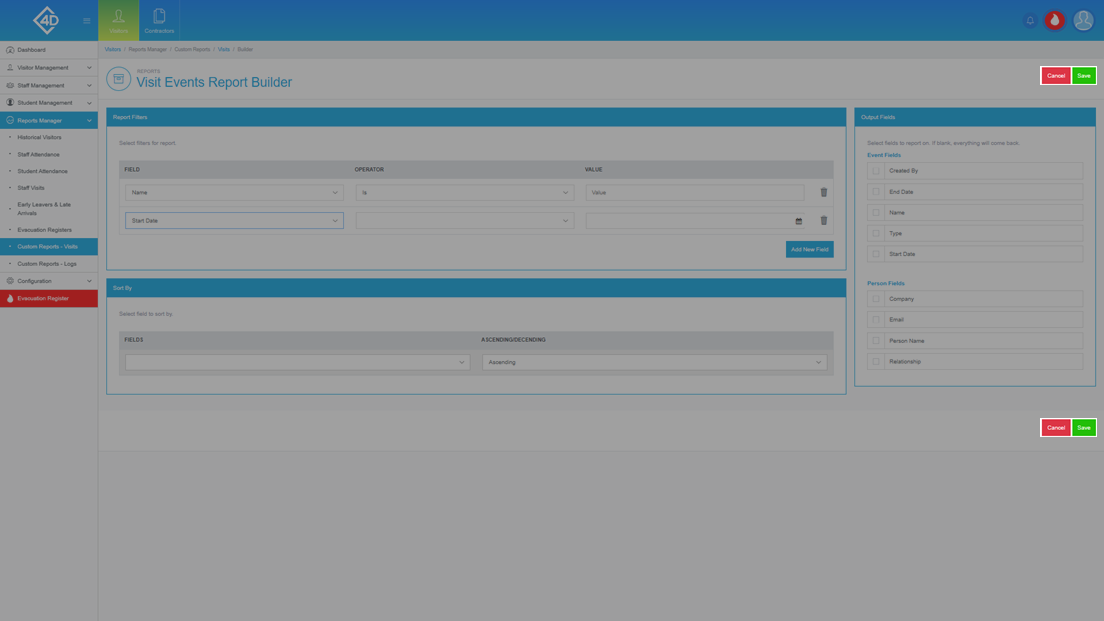
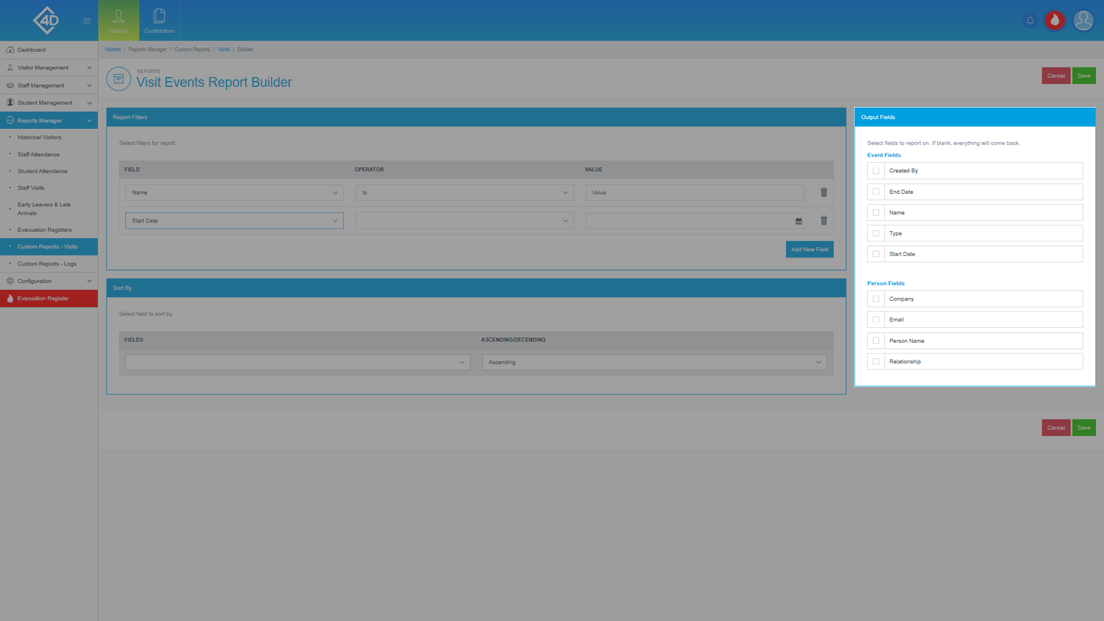
Once you have clicked the "Add New" button you will be taken to the following page.
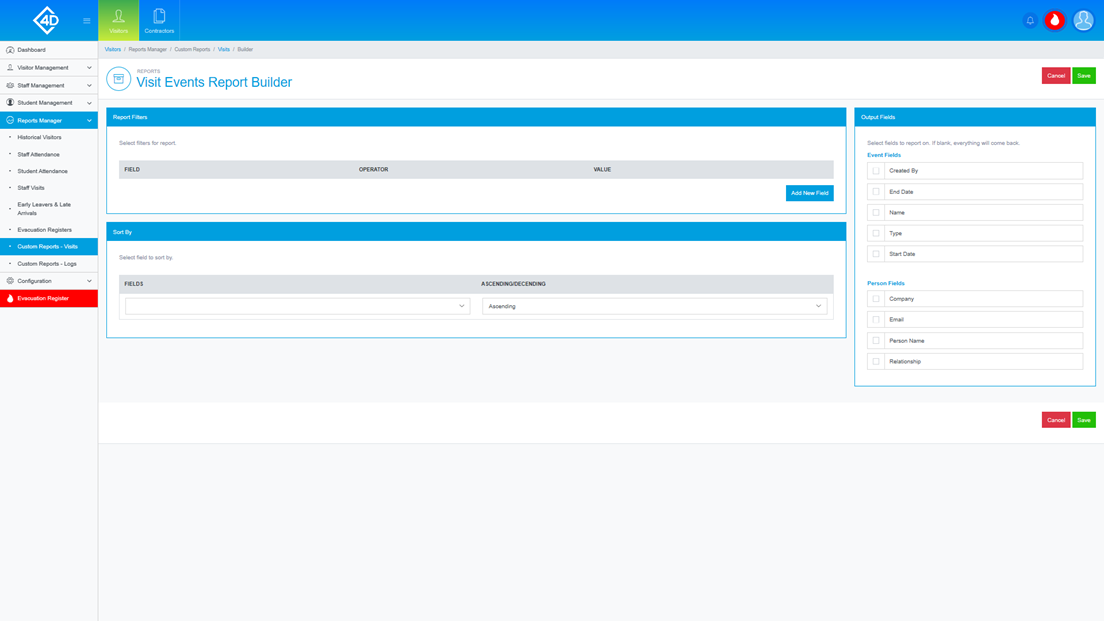
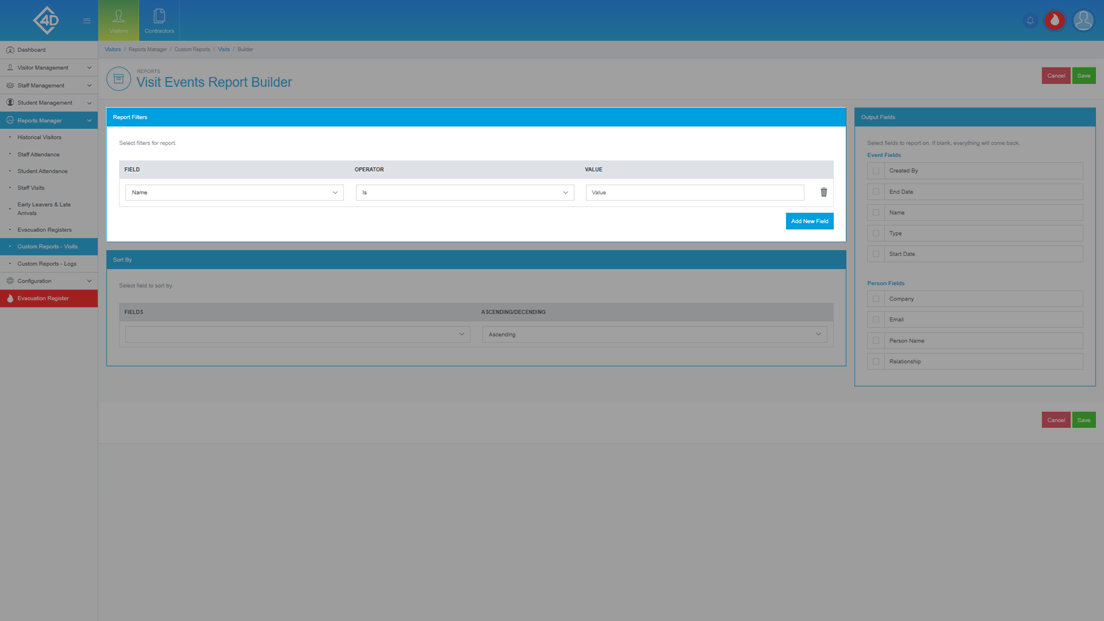
The "Report Filters" section is used to add new filters to your report, to start, click the blue "Add New Field" button, you can then choose from a list of standard fields, this includes "Signed In", "Signed Out", etc...
Once you have selected a field you must then select an "Operator" type and assign a value.
The following example is used to check for "Attendees", the "Field" is set to "Relationship", the "Operator" is set to "Is" and the "Value" is set to "Attendee".
This report when ran will search for any "Visitor" that has been signed in as an "Attendee".
Follow this basic principle to create your set of filters.
The "Output Fields" section is used to select Fields that will be outputted.
Once you have selected a Field it will then be shown on the report when it is run, any Fields that have been left unchecked will not show on the Report.
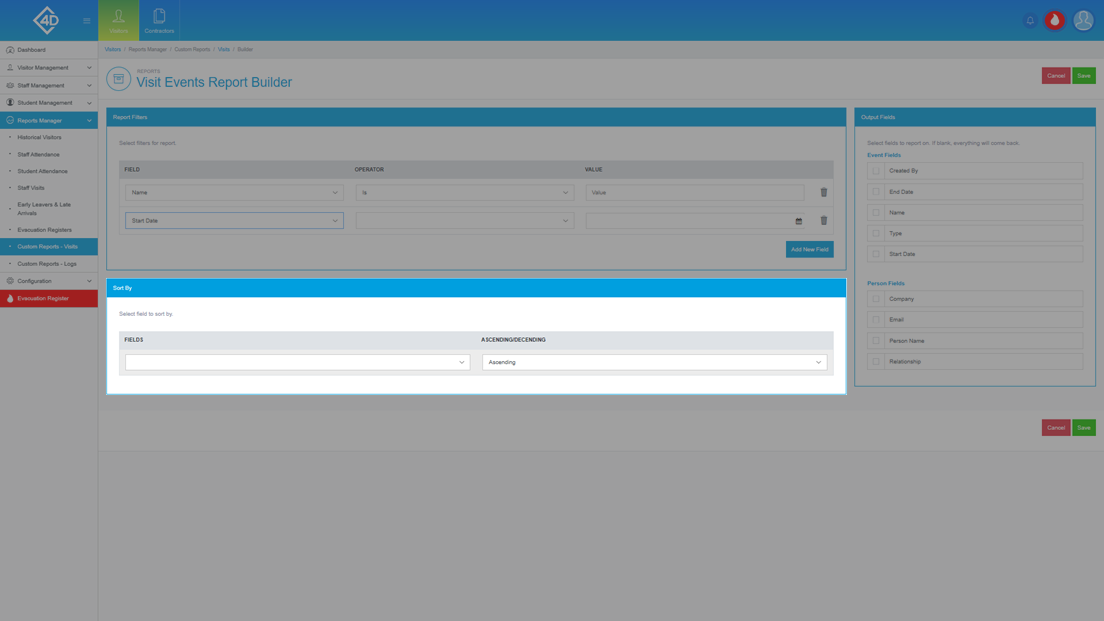
The "Sort By" section is used to specify which column to sort by when you run the Report.
To do so select a "Field" from the drop-down menu, you must then select whether you want to sort by "Ascending" or "Descending".
Once you are happy with the Report, click the green "Save" button, your Report will then show on the previous page.
If you would like to cancel the creation of a new Report, click the red "Cancel" button.